Jimi Hendrix tops almost every greatest guitarist list ever written — and one of the biggest reasons is his revolutionary approach to rhythm guitar.
Hendrix didn’t just play chords. He blurred the line between rhythm and lead so completely that his rhythm parts feel alive, expressive, and melodic all at once.
The great news?
You can start getting that same feel with just one chord shape and three simple steps.
In this lesson we’ll break down the core Hendrix rhythm guitar technique to help you recreate the same ideas you hear in “The Wind Cries Mary”, “Purple Haze”, “Fire”, and “Little Wing” — and give you a clear path to bringing your own rhythm playing to life.
Let’s get into it!
Step I: Ditch the barre chords
The foundation of the Hendrix rhythm style is simple: swap your barre chords for compact major triads (and specifically those sitting in the middle strings).
When most guitarists see a major chord progression, they either reach for an open-position chord or a full barre chord.
Both are completely valid — but the open position chords often don’t have the right “feel” for the track, and barre chords limit your options.
This is because your fretting hand is locked down and every finger is committed, which stops you from adding the embellishments that give Hendrix’s playing its signature character.
The good news though is that we can get around this problem by taking a barre chord shape and stripping it back to its three essential notes – the triad.
There are a variety of major triad voicings that you can play all over the fretboard and on different strings.
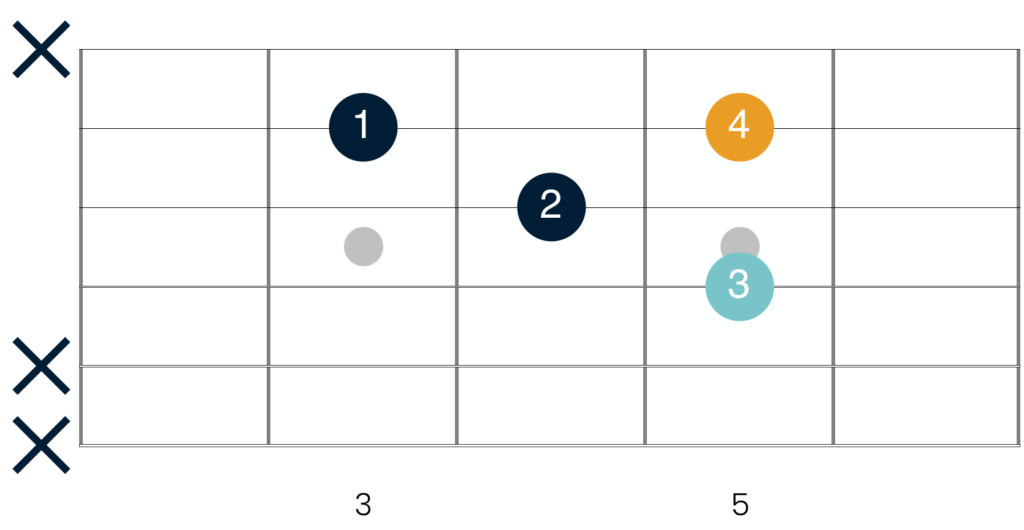
However the triad shape that Jimi Hendrix uses most frequently in his playing looks like this:
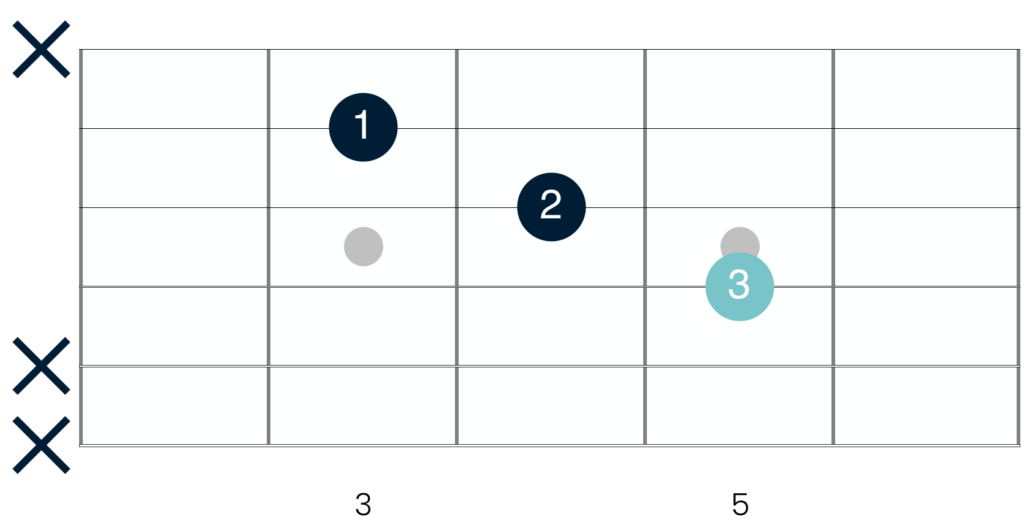
This specific triad is a G major triad, with the root note of the triad highlighted in light blue.
In contrast to a regular G chord in the open position, or a G major barre chord shape, you don’t play all 6 strings here. Instead you only play the strings that you are fingering – the D, G and B.
The intervals of this triad are as follows:

So you play the root first, then the major third on the G string and then the 5th on the B string.
The specific notes of this triad are as follows:
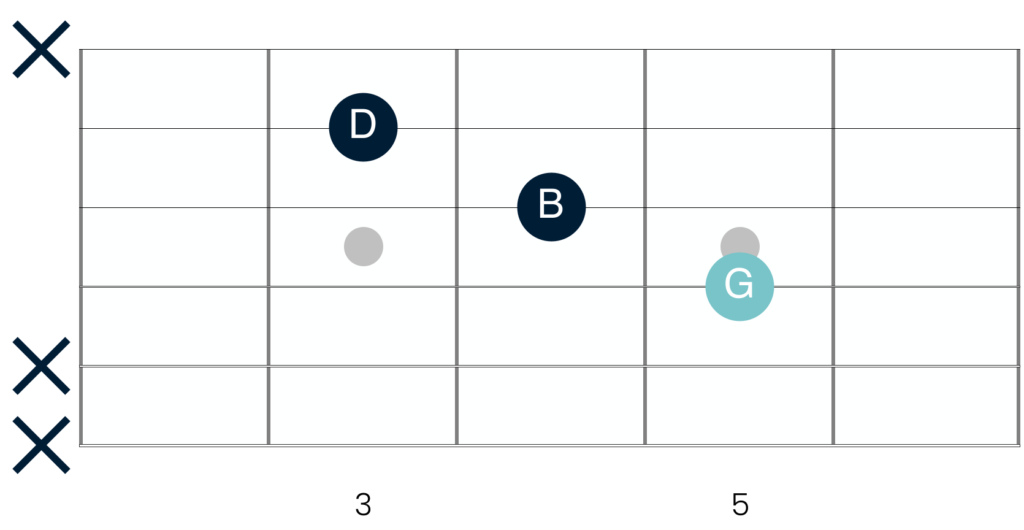
These diagrams might look complicated at first, but this major triad is in fact nothing more than the three essential notes from a G major chord (played either in the open position or as a barre chord).
Now though, your little finger is free to add embellishments and notes to the chord to change its quality.
We’ll look at those in a moment, but first its worth covering a few quick points:
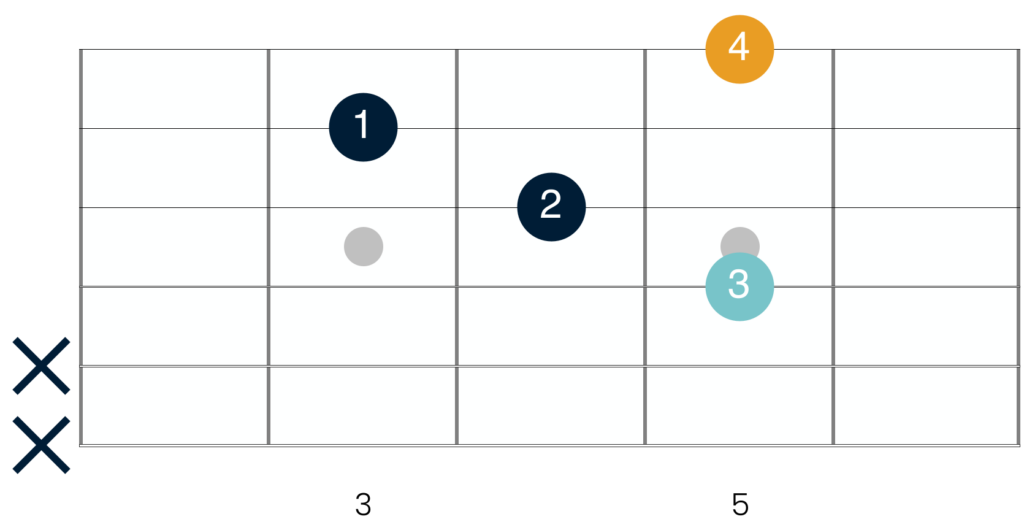
The first of these is that this shape is fully moveable. The root note is on the D string, so if you slide it up two frets you have an A major triad, and if you go up two frets again you have a B major triad, and so on.
The second, is that you can also lay your first finger flat and barre it across the B and E strings, like this:
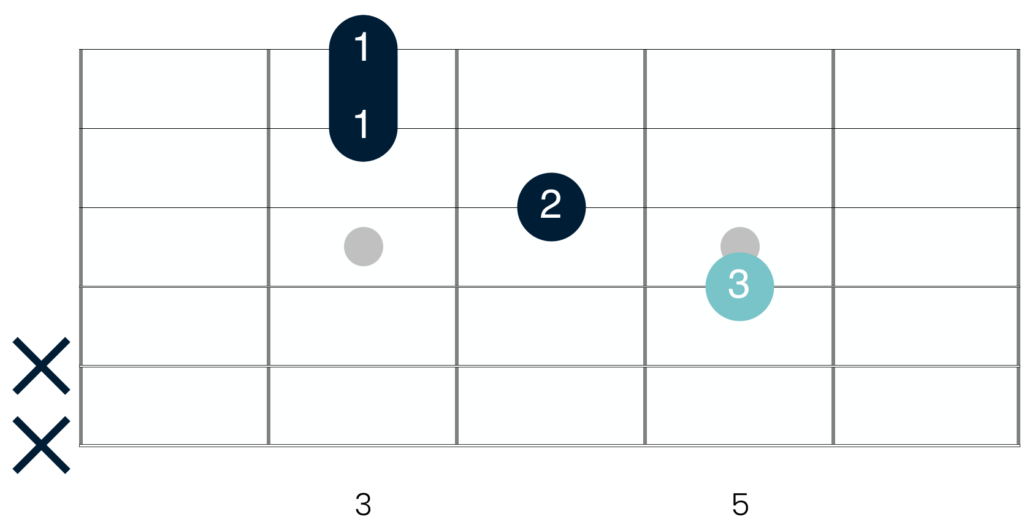
The “new note” on the high E string is simply another note of G, this time an octave higher. So it doesn’t change the fundamental sound or quality of the chord, but it does give you some further options for embellishment.
We’ll look at those in a minute, but first – get comfortable playing this triad shape cleanly across a few different chord positions.
As you do so, focus on accuracy — making sure that you’re not hitting unwanted strings and that the notes of the triad are ringing out cleanly.
Step 2: Add embellishments
This is where the Hendrix rhythm guitar magic really begins. When you use the major triad shape illustrated above, your fourth finger is free to add embellishements to the chord.
This allows you to quickly and fluidly alter the kind of chord you are playing, and create a much more interesting rhythm part.
Here are three new chord types you can create by simply moving your little finger into different positions:
The suspended 4 (Gsus4)
If you place your little finger on the 5th fret of the G string you will create a suspended 4, or Gsus4 chord:
Putting the little finger on the fifth fet raises the major third up a semitone to the fourth, creating a suspended 4 chord and that open, unresolved sound you hear in so much of Hendrix’s playing.
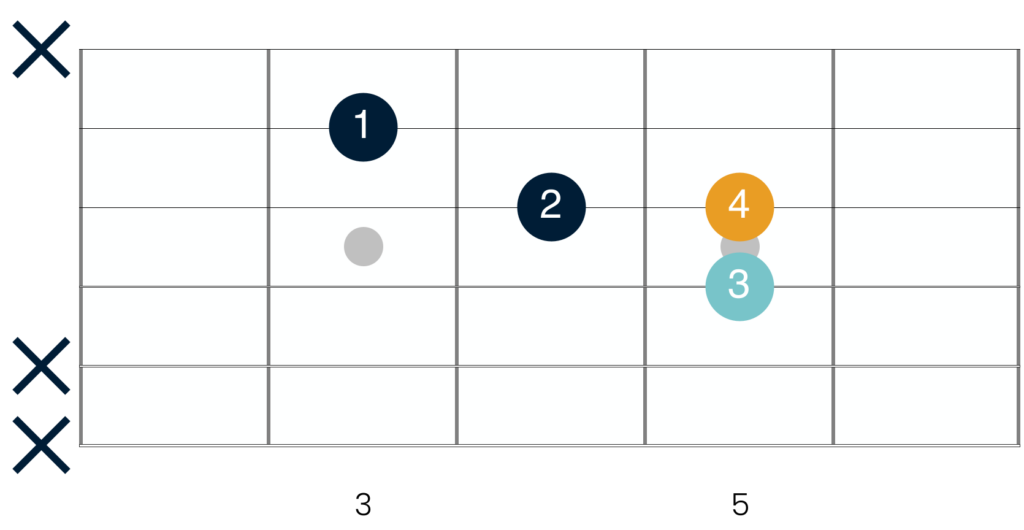
The major 6 (G6)
If you shift that fourth finger down to the 5th fret of the B string then you “block” the major fifth interval and add the major sixth instead – creating a warm and bluesy sounding 6 chord, which you hear everywhere in Hendrix’s playing and in blues music in general:
This is the exact embellishment driving the rhythm part in “The Wind Cries Mary”.
Hendrix hammers on and pulls off to this 6th interval over the G chord and then the Bb, creating a flowing movement between chords and a much more interesting rhythm part as a result.
“Purple Haze” and “Fire” use this same triad and embellishment idea in a high-gain rock context, illustrating just how much mileage you can get from this one idea.
The add 9 (Gadd9)
If you move your little finger down again to the 5th fret of the high E string, you add the note of A into the chord. This is the major second interval, played an octave higher – turning it into the ninth.
And because the chord has no seventh interval this turns it into a Gadd9:
This Gadd9 chod has a bright and open quality. It’s not a classic blues chord, but you will encounter it in rock music and in a lot of diatonic progressions (those based out of the major scale).
You hear this add9 voicing all through “Little Wing” — with Hendrix using a single chord shape to create a beautifully rich and complex chord progression.
Before we move onto the final step, it’s worth noting two final points here:
The first of these is that you don’t need to know the theory behind these chords to use them in your playing.
The theory provides useful context, but what arguably matters more is training your ear to hear what each embellishment does to the chord’s feel, and learning to move between them fluidly.
Lastly, you can think about sliding between these chords as a way of embellishing them.
Hendrix rarely jumps from chord to chord in his playing. Instead he chooses to slide into shapes to add movement and interest to his progressions. You can hear this particularly clearly in songs like “The Wind Cries Mary” and “Little Wing”.
So if you want to recreate the same feel in your own playing, try moving between chords in this same way to add a bit of that Hendrix magic.
Step 3: Add the thumb
The eagle-eyed amongst you might have noticed that throughout the playing examples above, my thumb is hooked over the top of the neck.
This is the third layer of the Hendrix rhythm guitar approach, and it makes a big difference.
By using the thumb to play the root note on the low E string and then landing on the triad in the middle strings, Hendrix is able to “split the chord”, adding a lot more texture and variety to his rhythm playing.
With this addition, the G major triad now looks like this:
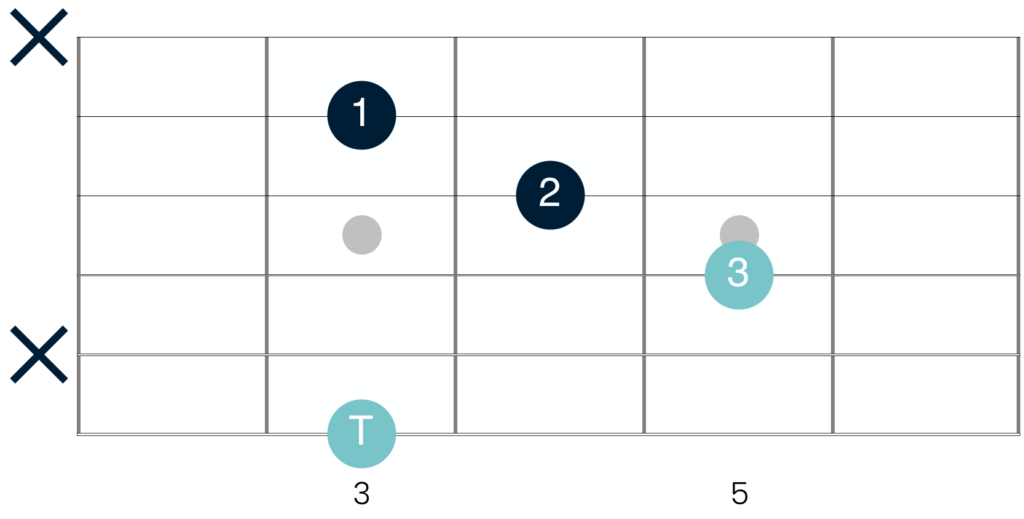
This is particularly clear in “The Wind Cries Mary”, where Hendrix repeatedly picks out the bass note of each triad as he moves through the progression.
This “thumb over” style has since been adopted by a lot of guitarists, though most notably Stevie Ray Vaughan and John Mayer.
In fact you can see Mayer utilising this exact technique in songs like “Slow Dancing In A Burning Room”, where he bounces between the bass note and triad.
When you are trying this out in your own playing, be careful to maintain some air between your palm and the back of the neck of your guitar. This is a comfortable and efficient position that will help you to move around freely as you switch between chords.
Putting it all together
Each of these steps works well individually, but the Hendrix magic will really shine through in your playing when you combine them together.
So once you feel comfortable with each of these steps, work on bringing them together by following these steps:
- Pick a simple chord progression (a I, IV, V in any key would be a great place to start!)
- Replace all of your barre chords with the major triad shape in the middle strings.
- Add little finger embellishments on any chord where the moment feels right and see what happens.
- Hook the thumb over and experiment with playing the bass note before landing on the triad.
- Add slides between chord changes — especially approaching from a fret below.
Give these ideas a go, and let me know below if you have any comments or questions.
And if you’d like to go a little deeper into the chord theory discussed here, then inside the Blues Club you’ll find a full set of in-depth of courses that walk you through all of it step by step.
Have fun, and I’ll see you next time!


Responses