I can still remember when I learnt how to play the blues shuffle.
At just 12 years old, it was the first time that I had ever played the blues, and it had me hooked almost instantly.
It marked the beginning of what has since developed into a deep love and passion for blues music and blues guitar playing.
Even to this day, I think there are very few things that beat playing a blues shuffle with a band and really locking into the groove.
In my last two articles, I wrote about blues rhythms and how to master the blues shuffle rhythm.
Those articles cover the different grooves and feels you will frequently encounter in the blues, and the rhythm used in the blues shuffle. So if you are new to this material, I would recommend starting there.
Once you have those concepts and rhythms nailed, we can progress one step further by looking at different ways to actually play the blues shuffle.
For although the blues shuffle typically follows the 12 bar blues progression, it is often played in a different way.
A lot of blues music is based around dominant 7th chords. Rhythm guitarists play the full versions of these chords, and use riffs and fills more sparingly.
Conversely, the blues shuffle tends to be more riff-based.
It is usually played using single note lines, simple power chords or a combination of the two. This creates a distinctive sound that is unique to the blues shuffle.
There are – as you might expect – a lot of variations on the blues shuffle, and many more than I could cover in one article.
Yet despite the number of these different variations, most of them derive from just two simple, common forms of the blues shuffle.
If you want become a great blues rhythm guitarist then, these are the two key forms of the shuffle that you need to learn.
Once you have learnt these forms, you can then alter and embellish them.
This will keep your rhythm guitar playing varied and interesting, and empower you to play rich and complex blues shuffles, like ‘Pride and Joy‘, by Stevie Ray Vaughan, amongst countless others.
Some opening thoughts
Before diving in, there are two quick points to cover.
The first is theoretical. If you have followed my last two articles, then you will have seen shuffle time notated as follows:

However, because eighth notes like these are so often played with a triplet feel, it is quite common to see triplets notated as straight eighth notes.
In these instances, there is an instruction like this at the beginning of the piece:
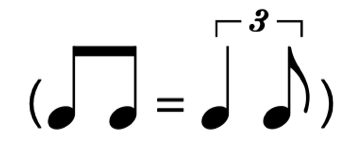
This simply indicates that the piece is to be played with a shuffle feel, even if the notes are written out as straight eighth notes.
The second point is around articulation.
I will cover this in more detail in my next article – as altering the way that you play the blues shuffle (without altering the notes) can dramatically change the feeling of a piece.
For the two forms of the blues shuffle described here though, I would recommend that you gently dampen your strings with your strumming hand.
This will keep the notes short and clipped, which will give your rhythm playing a tight feel and keep you locked into the groove.
For now though, here are the two simple forms of the blues shuffle you need to learn:
The classic shuffle
This is one of the easiest and most effective ways to play the blues shuffle.
In fact this form represents the classic sound of the blues shuffle. It is instantly recognisable and has a real bluesy feel to it.
This is what it looks like in the key of A:
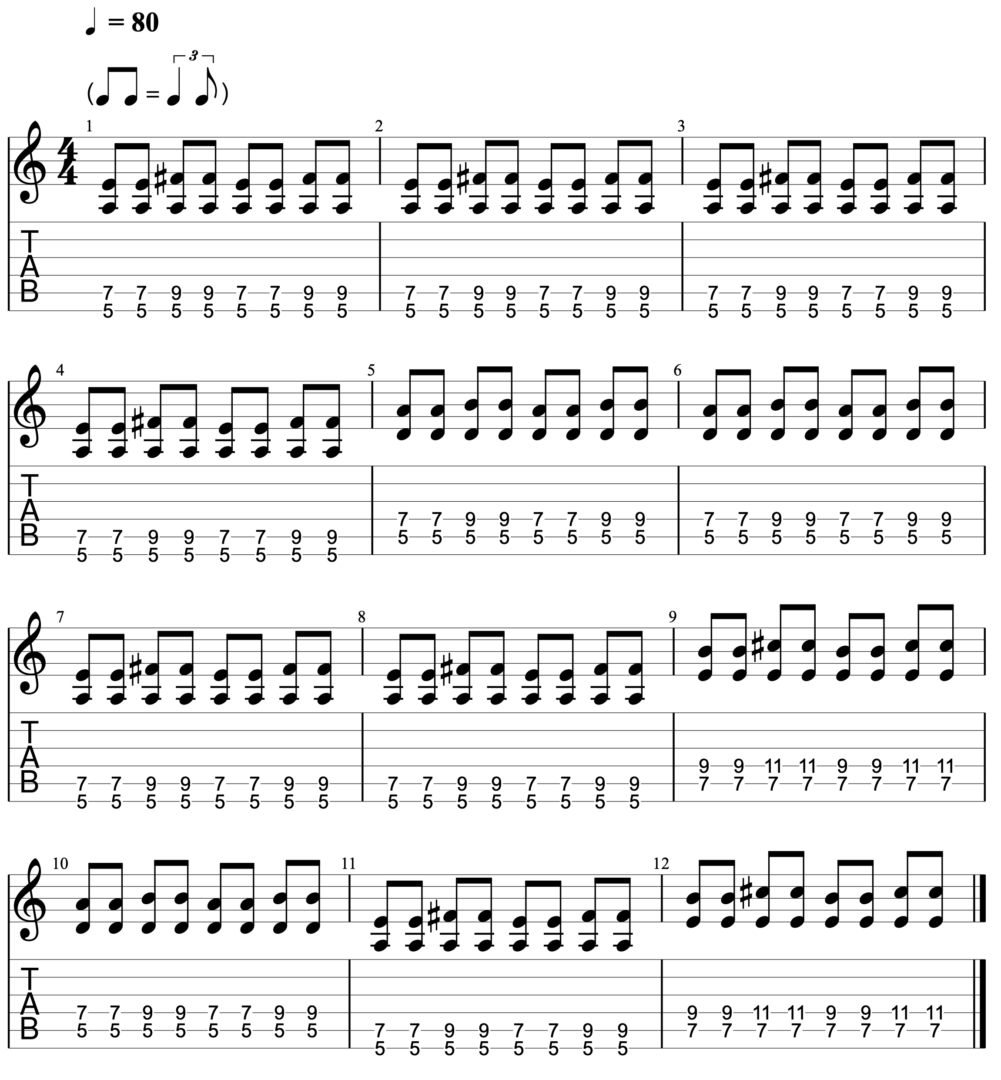
And at 80 BPM (beats per minute), this is what it sounds like:
There are many different ways that you can vary this simple pattern and I will be covering a number of these in more detail in my next article.
As a first step though, learn this shape and get comfortable playing it across a variety of different keys.
The riff-based shuffle
The second common form of the blues shuffle is riff-based.
In this form, instead of playing chords, you play a repeating riff. This riff then follows the chord progression of a typical 12 bar blues.
This form of the shuffle works very well if you are playing alongside a keyboardist or another guitarist.
One person can play the chords, whilst the other plays a riff that follows the chords.
It adds some complexity to the rhythm and keeps the song interesting. This is what a typical riff-based shuffle looks like in the key of A:
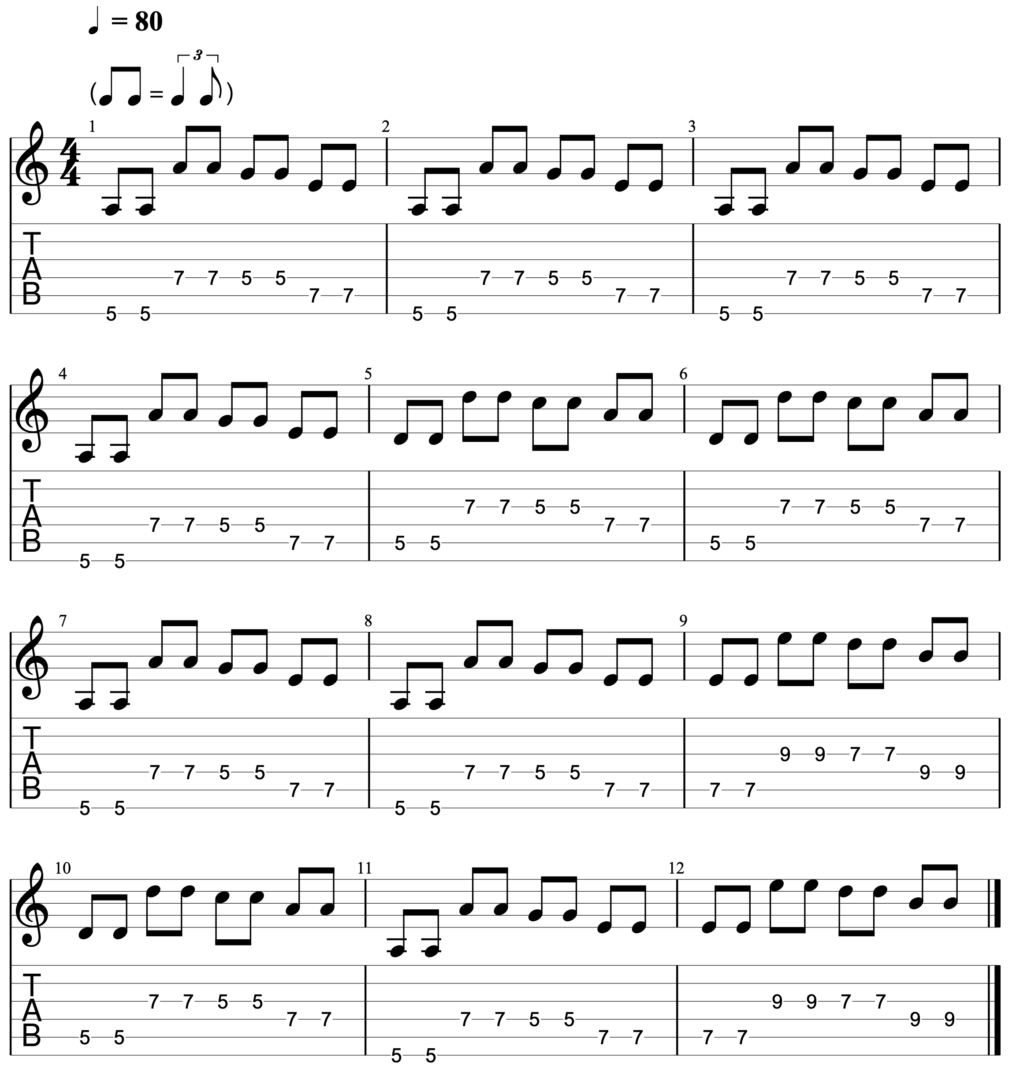
And at 80 BPM (beats per minute), this is what it sounds like:
As noted above, there are a great many different ways that you can vary this simple pattern. I will be covering these in more detail in my next article.
As a first step though, learn this shape and get comfortable playing it across a variety of different keys.
The next steps
Learning the material here is a great step to playing brilliant blues rhythm guitar. It will provide you with the foundations on which you can build and learn to play more complex shuffles.
This is important. For although the two forms of the shuffle outlined here both sound great, they are somewhat limited.
If you overuse them they will begin to sound repetitive and a little bit lifeless.
Introducing variations to these simple forms is the way to avoid this. So in my next article, I will be covering interesting ways you can add variety and spice to your blues shuffle.
If you have any questions that I can help with in the meantime though, just pop them in the comments or send me an email on aidan@happybluesman.com. Good luck and happy shuffling!
Images
References
Best Blues Guitar Lessons Online, Guitar Habits, Guitar Lessons


Responses
Yo, are you supposed to play the Classic shuffle by stretching your little finger to the 9th fret while keeping your index finger on the 5th? I have some stretching to do before I can manage that 😛
Haha it can be a bit of a stretch for sure! If you struggle to get your little finger over to the 9th fret though, you can play the exact same notes in a way that is easier on your hand. All you have to do is move your first finger down to the 2nd fret on the D string, and then you can play the same shuffle by using your ring finger on the 4th fret and then playing the A and D strings together. This gets rid of the stretch and puts your hand into a more comfortable position. If you head over to this article that I wrote – 6 Ways To Play A Better Shuffle – then you can see the fingering laid out here in example 1 (and most of the other examples too). I hope that makes sense and is a bit easier for you, but if you have any more questions at all that I can help with, please do just send them across to aidan@happybluesman.com and I’d love to help!